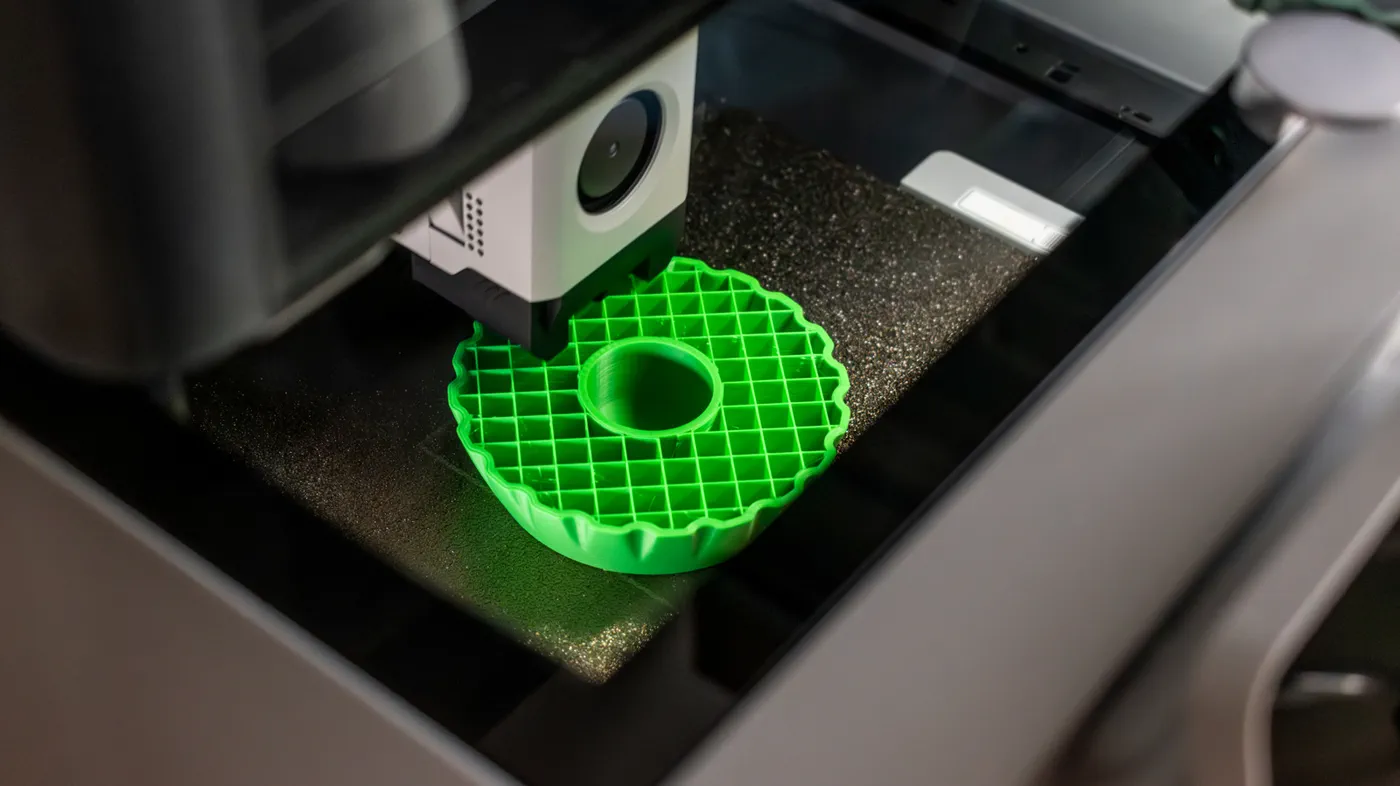
If you cut open a 3D-printed plastic object, you will rarely find solid plastic inside. Instead, slicing software builds a hidden geometric web known as infill to provide internal rigidity and support upper layers without wasting entire spools of filament. For desktop fused deposition modeling (FDM) enthusiasts, infill settings represent one of the most critical compromises between print duration, material expenditure, and mechanical strength.
Yet many beginners routinely ask whether infill is an absolute requirement or simply a default setting they can dial back. The short answer is nuanced: while infill is mandatory for spanning wide ceilings and bearing mechanical loads, many prints can succeed with minimal internal structure—or none at all. Understanding how internal geometry functions is the key to tuning faster, lighter, and more durable prints.
What Infill Is and How Slicers Build It
In FDM 3D printing, an object is constructed layer by layer using extruded molten thermoplastic. The model consists of external perimeters (the outer and inner walls), top and bottom solid surfaces, and the cavernous space between them. Slicers like PrusaSlicer, Cura, Bambu Studio, and OrcaSlicer automatically generate a repeating geometric lattice within that internal void.
Rather than printing solid plastic, the slicer program computes toolpaths that lay down intersecting ribs, continuous waves, or expanding cells. This architecture bonds firmly to the interior perimeter walls, anchoring the shape from the inside out. Users control this internal skeleton through two primary variables: infill density (expressed as a percentage) and infill pattern (the mathematical shape of the lattice).
By default, slicers insert infill across every interior layer unless instructed otherwise. However, infill is predominantly an FDM-specific concern; stereolithography (SLA) resin printers naturally cure solid resin cross-sections unless the user intentionally runs a specialized hollow command with drainage holes to avoid suction cups and trapped liquid resin.
Watch: Rethink how you use 3D printer infill!

Video: Made with Layers Thomas Sanladerer on YouTube
The Core Purposes: Support, Strength, and Efficiency
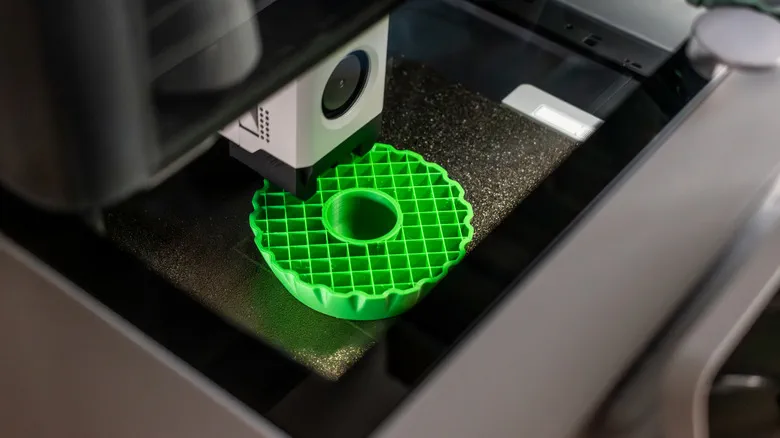 Photo: Engadget - Technology News & Expert Reviews (source)
Infill serves three primary engineering functions inside a printed part, each balancing distinct physical trade-offs:
- Internal Top-Layer Support: Molten filament cannot print in midair. When a printer reaches a flat roof or ceiling, it must bridge filament strands across internal gaps. Without internal struts beneath the ceiling, the extruded plastic sags into the void, causing top-surface pitting, rough texture, and collapsed layers known in the maker community as "pillowing."
- Structural Rigidity and Load Distribution: While external shells bear external friction and tensile forces, infill acts as internal trussing. It prevents the thin vertical walls from buckling under lateral squeeze, distributes impact stresses throughout the volume, and increases overall compressive resistance.
- Filament and Time Efficiency: Printing a solid plastic block can take multiple days and consume hundreds of grams of filament. Infill reduces plastic usage by 70% to 90% for typical parts, dramatically reducing spool costs and slashing machine run-times while maintaining structural adequacy.
Is Infill Actually Necessary? When You Can Print at 0%
Infill is not an absolute law of physics; it is an engineering convenience. There are several distinct scenarios where setting your slicer's infill density to 0% is not only viable, but preferable.
First, models designed with tapered geometries that close gradually toward the top do not require internal scaffolding. If interior overhang angles remain below 45 degrees, each subsequent layer steps inward slightly, resting securely on the layer below it without requiring an internal web to catch falling filament. Hollow figurines, decorative busts, and architectural cones often print cleanly with zero infill.
Second, "vase mode" (officially called Spiralize Outer Contour in slicers) completely disables infill and internal travel moves, extruding a single continuous strand of plastic in an uninterrupted rising spiral. This produces lightweight, translucent, and watertight cylindrical items like trash cans, lampshades, and planters in a fraction of standard print times.
However, you cannot eliminate infill on parts featuring broad, flat upper roofs or horizontal ceiling planes. Without internal ribs beneath them, bridges across wide open cavities will droop severely, leaving ruined surface finishes and holes. Furthermore, any functional bracket, handle, or mounting plate printed at 0% will crush under the slightest thumb pressure.
Infill Density Explained: Finding the Sweet Spot
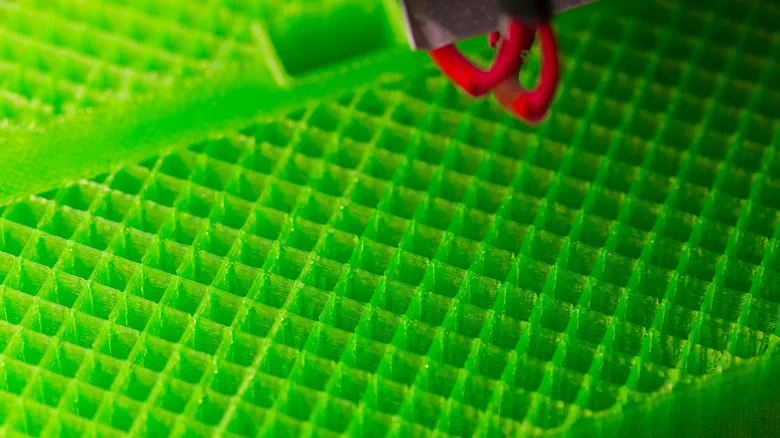 Photo: Engadget - Technology News & Expert Reviews (source)
Infill density measures how much of the internal volume is filled with plastic. A 0% density creates an empty chamber, while 100% creates a solid piece of homogeneous plastic. Beginners often assume that printing at 100% infill produces the strongest possible part, but material science reveals diminishing returns.
Testing has repeatedly demonstrated that strength gains plateau once infill passes 50% to 60%. Moving from 20% to 50% provides noticeable rigidity improvements, but pushing from 60% to 100% consumes exponentially more filament and print time while yielding only marginal gains in tensile strength. In fact, 100% infill can induce severe internal thermal stress, leading to corner warping and dimensional inaccuracy as thick masses of cooling plastic shrink.
For everyday hobby prints, printer manufacturers like Prusa Research recommend a baseline of 10% to 15%, while Flashforge suggests starting around 20%. If the part merely sits on a shelf looking pretty, 5% to 10% is more than adequate.
The Anatomy of Infill Patterns
Selecting the right mathematical pattern dictates whether your part is rigid in one direction, uniform in three dimensions, or fast off the print bed. Slicers provide dozens of options, but five dominate modern workflows:
- Gyroid: Built from triply periodic minimal surface equations, gyroid produces wave-like channels. It provides isotropic (uniform) strength in all directions, drains resin or water easily, and never crosses its own path on a single layer, eliminating nozzle scraping. It has become the default recommendation in modern slicing profiles.
- Grid: A simple two-dimensional matrix of crossing perpendicular lines. It is rigid and fast to calculate, but because lines cross on the exact same layer plane, the nozzle routinely clicks or catches on previous intersections, which can cause layer shifts on high-speed printers.
- Rectilinear: Prints alternating parallel lines on every layer (e.g., 0 degrees, then 90 degrees). It prints very rapidly and avoids nozzle self-intersections, making it the standard choice when 100% solid fills are required.
- Cubic / Adaptive Cubic: Forms a three-dimensional matrix of stacked diagonal cubes. Adaptive variants automatically vary the density—printing sparse infill deep within large volumes and denser infill near the top surface to conserve filament while ensuring smooth ceilings.
- Lightning: A specialized tree-like pattern designed solely to hold up top roofs. It leaves lower cavities completely hollow and sprouts branches outward only as it approaches the ceiling. It offers virtually no structural strength, but it prints faster than any other pattern for decorative objects.
The Wall Count Paradox: Why More Infill Isn't Always Stronger
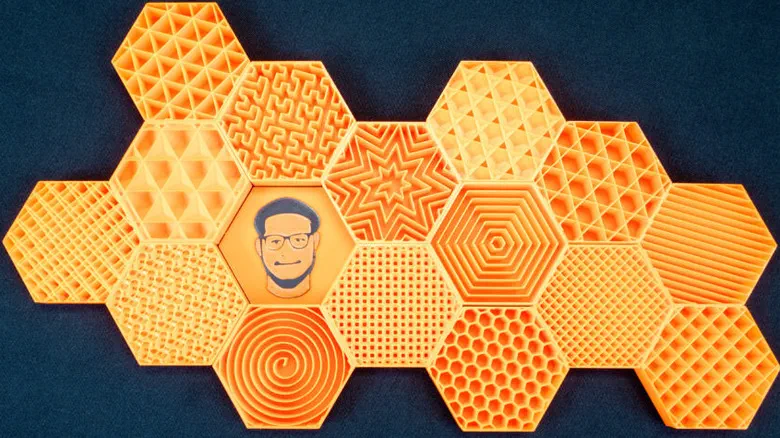 Photo: Engadget - Technology News & Expert Reviews (source)
One of the most counterintuitive rules of 3D printing is that adding perimeter walls (shells) produces a significantly stronger part than increasing infill density.
In structural mechanics, bending and tensile stresses concentrate primarily on an object's outer surfaces. If a functional bracket snaps under load, the fracture almost always initiates at the outer perimeter. Increasing your slicer's perimeter count from 2 walls to 4 walls will dramatically boost flexural stiffness, impact resistance, and clamp strength far more effectively than moving from 20% to 80% infill, all while consuming less material and printing faster.
Before you increase your infill percentage to fix a fragile part, double your wall thickness and top/bottom shell layer count first. Reserve high infill percentages specifically for compressive loads where the part must withstand direct vertical squeezing.
Practical Infill Recommendations by Print Type
Use this reference guide to match your model's functional requirements with the appropriate slicer parameters:
| Print Category | Recommended Density | Optimal Pattern | Perimeter Walls | Primary Goal |
|---|---|---|---|---|
| Pure Display / Figurines | 5% – 10% | Lightning or Rectilinear | 2 walls | Maximum speed, minimal filament waste |
| General Household Items | 15% – 20% | Gyroid or Grid | 3 walls | Balanced weight, durability, and print time |
| Functional / Tool Holders | 25% – 40% | Gyroid or Cubic | 4 to 5 walls | High rigidity and resistance to lateral impacts |
| Heavy-Duty Mechanical Jigs | 50% – 60% | Gyroid or Honeycomb | 5 to 6 walls | Maximum clamping load without internal collapse |
| Vases and Hollow Vessels | 0% | None (Vase Mode) | 1 continuous strand | Watertight, single-wall decorative geometry |
Common Infill Pitfalls and How to Fix Them
Even experienced makers encounter infill defects that compromise their builds. The most common issue is nozzle grinding, typically heard as an audible clicking noise during fast print runs. This is almost always caused by using grid infill, where the extrusion nozzle must crash over solid intersection points on every single layer. Switching to gyroid or rectilinear instantly remedies the problem.
Another prevalent flaw is ghosting or infill show-through, where the internal geometric pattern is visible as faint ridges on the exterior walls of the print. This occurs when the printer extrudes infill before the outer perimeter, or when the infill overlap percentage is set too high in slicer settings. To eliminate show-through, enable the slicer setting to print outer perimeters first, or increase your wall count by one perimeter.
Finally, pillowing or holes in top surfaces occurs when the infill density is set too low for the top solid layers to span properly. If your infill density is below 15%, ensure you have configured at least 4 to 6 top solid layers in your slicer so the final passes can bridge and flatten out smoothly over the sparse underlying grid.
FAQ
Can I print functional brackets with 100% infill? You can, but it is rarely necessary and can cause dimensional warping due to plastic contraction. A part printed with 40% to 50% gyroid infill and 5 to 6 solid perimeter walls will generally deliver comparable mechanical performance with lower material cost and faster turnaround.
Which infill pattern prints the fastest? Lightning and rectilinear are among the fastest patterns to print. Rectilinear moves primarily in straight alternating sweeps, while lightning only prints where top surfaces strictly require bridging support.
Why does my 3D printer make grinding sounds during infill passes? Your slicer is likely using grid or cross patterns, which force the hot nozzle to cross over previously extruded lines on the same layer. Switching your infill pattern to gyroid or rectilinear stops these collisions entirely.
Does flexible TPU filament require infill? Yes, but you should adjust the density and pattern to regulate flexibility. A low infill percentage (5% to 15%) using gyroid or concentric patterns allows TPU prints to compress and spring back without binding internally.
How does infill affect resin (SLA) printing? Resin printers do not print standard infill by default; they produce fully solid models. To save resin, users manually hollow the model using software, adding internal drain holes so uncured liquid resin can escape rather than becoming trapped inside the cured shell.